Truck Makes Tickling Noise When Accelerating – How To Fix

The best thing about driving a truck is hearing the roaring sound of the engine. But sometimes, the roaring sound can be accompanied by tickling noise, which should not be the case. The tickling sound whenever you press the gas pedal indicates that one of the components is faulty. This guide will cover all the potential problems, and how to fix them.

Law Oil Pressure

Law oil pressure harms the engine as the metallic parts hit and rub against each other. The tickling sound results from the dry engine parts rubbing and hitting against each other. In such a situation, you will hear the tickling sound when your truck is stationary but the engine is running. However, the sound intensifies when you press the gas pedal. 

How to Fix Tickling Noise When Accelerating

First, you need to refill the oil reservoir, but if you did this recently, check for leaks, as this can deplete oil from your truck quickly.

Always change the oil filter anytime you change your oil. Low oil pressure results from a clogged oil filter, leading to an inadequate oil supply to the engine. 

Exhaust Leaks

The exhaust system does the role of expelling the combustion by-products from the combustion chamber in an organized and controlled manner. 

Exhaust leaks can happen anywhere within the exhaust system. But the leak within the exhaust manifold will manifest as a tickling sound within the engine compartment.

How To Fix Tickling Noise Caused By Exhaust

Exhaust manifold leaks sound serious, but fixing them is a simple procedure. Your mechanic can patch the leak. If the exhaust manifold is faulty, you will replace it at a cost though not expensive.
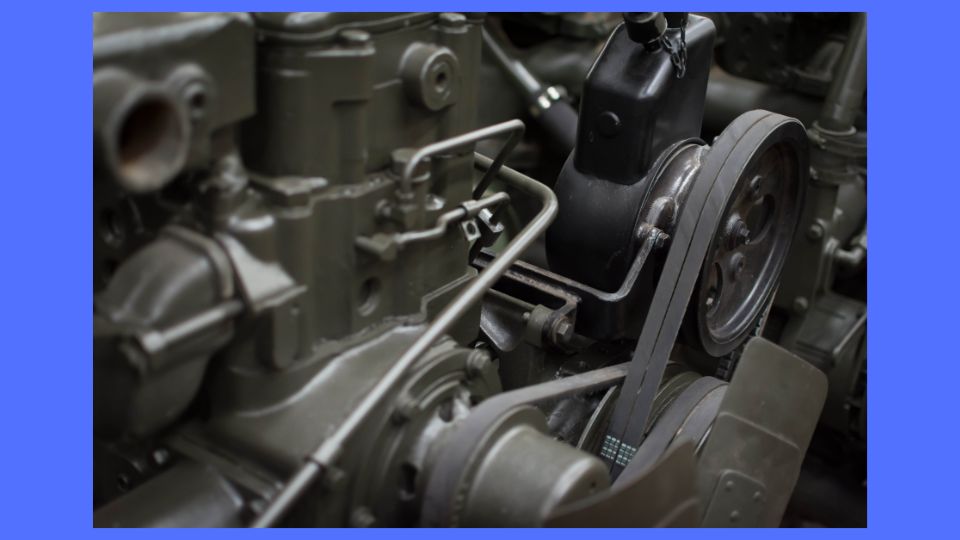
Faulty Valvetrain

The engine has various valves. All these valves are in two categories that are intake and exhaust valves. The valvetrain does the role of controlling the intake and exhaust valves. If the valvetrain or the valves are faulty, you will hear a tickling sound when you press the gas pedal. When this happens, your engine will misfire, reducing performance. 

How To Fix

It is easy to adjust the valvetrain. If you have the necessary tools, you can work on it as a DIY project. But you can consult your mechanic to do it on your behalf, which will cost $80 to $150.

Faulty Spark Plugs

The spark plugs seal every cylinder from the top. If not well fitted or cracked, the exhaust gases will bypass the seal, resulting in the tickling noise. Sometimes, the sparkplugs can damage the cylinder head threads, and you must replace them. 

How To Fix Tickling Noise From Faulty Spark Plugs

If your spark plugs are faulty, consider replacing them, but if they are loosely fitted, consider tightening them.

If the spark plug has damaged the cylinder head, consider replacing or repairing it, which is expensive.

Conclusion

Several issues cause a tickling noise whenever you press the gas pedal. It is essential to discover the possible cause of the tickling sound as it poses a greater risk to your engine. A damaged engine right from the cylinder head is expensive to fix. The above are the possible causes of tickling sounds and how to fix each. 

How To Bleed Brake Fluid Using A Pneumatic Vacuum Pump

How often do you bleed brake fluid and how do you do it? Air is essential for power production in the engine, but it is equally harmful when it gets into other parts of your truck. The engine requires air to burn the fuel in the combustion chamber effectively. On the other hand, air can be harmful when it gets into the braking system. When there is air in the braking system, your brake pedals will feel squishy, and the brakes will not be able to work. Thus, it is essential to remove any air molecule that may exist in the braking system through bleeding.

Initially, the process to bleed brake fluid was hectic as you needed someone to pump the pedal. But you can now perform this procedure without involving a second party. All you need is a vacuum pump with hand-operated triggers or connectors that you attach to the air compressor, making the bleeding process easy. 

Process TO Bleed Brake Fluid Using a Pneumatic Vacuum Pump

You need a floor jack, jack stands, vacuum brake bleeder, air compressor, line wrench, and wrench set to begin the process to bleed brake fluid. After having all the necessary tools, follow these steps.

Lift Your Truck And Remove the Wheels

Before lifting your truck, ensure it is on a level surface. Lift the truck using a floor jack and remove the tire. You can perform this procedure on one corner after the other until all the wheels are removed.

Attach All the Parts of the Vacuum Cleaner

Ensure that all the hoses are attached to the vacuum pump and that the pump itself is attached to the air compressor hose. At this point, consider turning on the air compressor. Identify where the bleeder port is. Usually, it is at the rear side of the caliper, and remove the dust cap. 

Attach the Vacuum Hose to the Bleeder Port

When doing this, consider starting with the wheel away from the master cylinder. The master cylinder is usually in front of the driver’s side. This means you should start working on the rear wheels. 

Attach the hose to the bleeder port and ensure the catch canister is tightly screwed so that no air can access the system. 

Drain all the Fluid from the Reservoir and Replace It

Open the hood of your truck and locate the brake reservoir, usually within the engine bay. Open the lead of the reservoir and drain the contaminated fluid. In this step, you can use tools such as a handheld turkey baster and fluid extractor. Refill the reservoir with new fluid and keep the cap on top of the reservoir. Do not tighten it to allow airflow.

Flush the Brakes

Loosen the bleeder screw a quarter turn using a wrench or socket. The screw is at the brake caliper. Turn the attached vacuum on the bleeder valve to suck out all the fluid.

Close the Bleeder Valve

If the fluid looks okay, remove the hose and tighten the bleeder valve using your wrench. Reattach the cap and fit the wheels. This is how to bleed brake fluid with ease.

Conclusion

When looking to bleed brake fluid using a pneumatic vacuum pump, check the brake fluid reservoir as the fluid level will go down and consider topping it up. Never allow the levels of the fluid to go down as this can let air into the system.

How To Replace the Fuel Gauge Of Your Truck

A fuel gauge is a simple mechanism to interpret. It has two markings when it points to ‘E’, your tank is empty, and when it points to ‘F’, your fuel tank is full. When it stops pointing, you will be left in darkness, guessing the remaining fuel and if it can let you reach the nearby filling station. 

Fuel gauge relies on electricity to work, whether analog or digital. But sometimes the fuel gauge fails to work efficiently.

Signs of a Malfunctioning Fuel Gauge

If you note these symptoms, your fuel gauge might be faulty.

  • The false appearance of low fuel light.
  • Reading ‘F’ when the tank is empty.
  • Reading ‘E’ when the tank is full.
  • Inconsistent readings.

Fuel gauge and fuel gauge sending unit are some of the electrical components with various parts. If its parts, like the fuse, are blown, or wires are not connected, you will experience any of the above symptoms.

To resolve the problem, you must diagnose your fuel gauge. When doing this, you will be under the hood testing various wires and dealing with the fuel. Ensure you have proper safety equipment. 

Diagnosing a Faulty Fuel Gauge

Here are the steps that will let you locate where the problem.

Checking the Fuse

Locate the fuse of your fuel gauge and check whether it is working perfectly. If it is blown, consider replacing it. It might be a different issue if the fuse is okay or if you replaced it, but the fuel gauge is still not functioning.

Perform a Self-Test

Most modern trucks have inbuilt testing procedures that you can activate using a combination of a light switch, the trip button, and other dashboard buttons. To perform it effectively, check the owner’s manual, which has a unique code for your truck. When running the test, your gauge is okay when the needle circulates through its up-and-down motion.

Testing the Fuel Gauge Sending Unit

You must know how to use a multimeter to test the fuel gauge sending unit. Follow the below steps.

  1. Check the owner’s manual, which will help you locate the fuel tank and the fuel gauge sending unit.
  2.  Access it by removing all the panels.
  3. Check if the wiring is okay or has any issues.
  4. Check the service manual to know the voltage standards for your fuel-sending unit.
  5. Use a multimeter to check the voltage of the wiring and the connector which supplies power to the sending unit. If the reading is inaccurate, follow the entire circuit to determine the issue.
  6. Check for resistance by plugging the connector and testing it again. If the voltage drops, it means that it is creating the necessary resistance.
  7. Remove the fuel-sending unit for further inspection if there is no resistance.
  8. After removing the unit, set your multimeter to ohms and test it.
  9. Determine the ohms range of your sending unit by checking the owner’s manual.

Conclusion

Fuel gauge has various components that work jointly to let you know the amount of fuel in your tank. If any of the components are faulty, it will not send accurate information. The procedure in this guide will let you know the exact faulty part so you can replace it soon. 

How To Replace A Headlight Bulb Of A Truck

Your truck’s headlight is one of the essential lights you will need at night and during harsh weather conditions. When one of your truck’s headlight bulb blows off, your truck will look cheaper and poorly maintained, you will attract the traffic police, and your visibility will reduce at night.

Replacing your headlight bulb is one of the most uncomplicated basic maintenance you can perform on your truck. Being easy does not mean you can blindly perform it. You will need special tools and proper knowledge of what is going on under the hood of your truck. If it is the first time to replace your truck’s headlights, then this guide will give you insightful information. 

Replacing the Headlight Bulb of Your Truck

You need a socket set, screwdriver set, Needle-nose pliers, and a flashlight. It is better to be safe when you work around the engine bay. Consider wearing protective gloves and disconnecting the battery when working on electronics. Here is the procedure for replacing your headlight.

Disconnect the Negative Battery Terminal

Before disconnecting the negative terminal of your battery, ensure your truck’s engine is off and completely cooled down.

Create More Space

Sometimes, you will need to remove your truck’s battery to access the headlight bulb. While in other trucks, you will need to remove the fluid tubes. Creating space will let you work without dropping the bulb in the engine bay.

Disconnect the Headlight Connector, and then Disconnect the Bulb

Accessing the headlight closure varies depending on the type and model of your truck, but everything will start from the back of the headlight housing. There is a plug connected to the headlight. Locate it and disconnect it. When you twist the connector in some trucks, the bulb will come out from its housing. 

Fix the New Bulb

You should never touch the bulb with your bare hands. Use the base of your new headlight bulb to fix it. Ensure the fixing is done correctly.  

Reassemble Everything

After ensuring that your bulb is firmly fixed, and secure, put back the headlight housing, plug it into the connector and connect everything you disconnected to create room. Connect your battery and tighten everything. 

Test Your New Headlight

After ensuring everything is well connected, turn on the high and low beams. Just to be sure that the bulb is working properly. If it is dark, ensure the bulb is sitting correctly to distribute light evenly.

Conclusion,

The process of replacing the headlight bulb for a truck varies depending on the type and model of your truck. The above are some universal steps that you will follow when working on the headlight of every truck. The above procedure is universal for the replacement of traditional headlights. The procedure is relatively different if your truck has LED headlights or Xenon lights. In such a case, take your truck to a professional or check the user manual to perform the procedure successfully. If your bulbs are not bright, it is essential check your lenses and clean any debris that maybe on them.

Here’s How to Adjust a Carburetor of A Truck

Do you know how to adjust a carburetor or a truck? A carburetor is a simple and reliable machine that still functions, just as Karl Benz built it in 1888. Air getting into the engine passes through the barrels of the carburetor. The air speeds up while passing through it, which creates a low-pressure zone. Due to this, fuel gets pulled into the low-pressure zones and later gets distributed in the cylinders where combustion takes place. 

Fuel pulling into the carburetor relies on air temperature, barometric pressure, choke and throttle opening, and fuel jet size. Adjusting a carburetor solely aims to balance the air-to-fuel ratio. After reading this guide, you will be able to understand how you can adjust your carburetor.

How to Adjust a Carburetor

There are various ways of adjusting a carburetor of your truck that are time-tested trial-and-error methods that are subjective and based on how your truck feels to drive. But, the scientific method of adjusting a carburetor is more accurate, and it includes using the air-fuel ratio sensor feedback and the exhaust gas analysis. Here is how to adjust your carburetor.

Remove the Air Filter

To access your carburetor, you have to remove the air filter.

Identify the Adjustment Screw

After removing the air cleaner, you must familiarize yourself with the idle speed screw and the idle mixture.

Connect the Vacuum Gauge

If you prefer a vacuum gauge for this procedure, consider connecting it to a manifold vacuum port and start your engine. 

Set Your Carburetor to Factory Adjustment

Consider setting your carburetor to factory adjustment if it is rebuilt or new. To do this, adjust the idle mixture screws to 1.5 -2 turns out and the idle speed screw to 1-1.5 turns in.

Turn On Your Engine

When the engine runs, it correlates with the proper air–fuel mixture. Leave the engine to run and reach the normal operating temperature, and then you can proceed. 

Adjust the Idler Speed Screw

Adjusting the idler speed screw will let you start with the engine’s normal running speed. If the idle speed is too high, you can do this during warm-up. 

Adjust the Air-Fuel Mixture

Adjust the idler mixture screw by 1/8 turn either in or out. If you have more idlers, adjust each directly to the other. When doing this, observe the condition of your engine as you continue. If it becomes rough, adjust the mixture screw the opposite way. If the engine starts becoming smooth, continue adjusting until it reaches peak speed. 

After meeting the engine’s peak running condition, rev it as you monitor its state when the RPM drops back to idle. If you have carefully followed the steps to adjust a carburetor, the idling speed will automatically increase.

Conclusion,

The process to adjust a carburetor is a relatively complex procedure, but you can do it with the right tools. If you have never done it before, consider doing it in the presence of a professional mechanic or let your mechanic do it on your behalf. Observing the procedure in this guide will help you to accurately adjust the carburetor of your truck. 

How To Remove Rust From Your Truck

Do you want to remove rust from your truck? As your truck is aging, it is likely to start rusting. Rust is a chemical process that is not only brought as a result of aging, the exposure to salt and water increases the rate at which rusting happens. If you keep your truck outside, the wet night temperatures will likely facilitate the rusting process. If you live in areas that experience winter seasons, driving your truck on wet roads where salt has been used to melt down snow and ice exposes your truck to rust. 

Rust can be a nightmare, especially when it appears on your loved truck. But it should not worry you since rusting is inevitable in anything made of metal. Here you will learn how to do away with rust from your truck. 

Remove Rust From Your Truck

When working on any part of the car, safety is a number one priority worth considering. Ensure your truck is parked on a flat surface with the parking brakes engaged. Put on glasses to protect your eyes. Ensure you are performing the procedure in a properly ventilated area. Here is how to remove serious rust from your truck.

Tape Off the Area

First, you need to isolate the area you are working. Doing this will protect the non-rusted areas from damage. When performing this procedure, a lot of rust and paint particles will be suspended in the air, which is unhealthy. Consider using real masking paper instead of a newspaper.

Remove the Paint and Primer

When doing this, start low as you work your way up. Use a dual action sander and a held-held grinder with a flap disc for the best control are the best for this procedure. Sanding through paint and primer will remove the rust on the metal. This process will remove most of the surface rust, but the rust usually perforates the metal leaving small holes. 

Remove Rust Pits

To do this, you will need a grinder, a drill with a wire wheel, or a chemical component that will remove rust. During this process, put on eye protection and a dust mask. The wire wheel will help you remove rust hiding below the metal surface and the pits. Remember that everything must be clean because primer and paint cannot stick to rust.

Prime the Surface

A proper painting job starts with a well-primed surface and thus uses a primer that is the best for direct metal contact. After this, you can use the best finish panel with surfacing primer or body filler, then a suitable paint. Remember, it is not good to use body filler on a metal surface directly, as the repair will crack with time.

Conclusion

Any form of rust is not good for your truck, and it is essential to protect your truck from rust. Most trucks get into contact with salt during winter, and after winter, the slightly warm temperature facilitates the process of rusting. It is essential to wash your truck thoroughly after winter. Doing this will let you spot areas that have started to develop rust and take the necessary precaution. Shared in this guide are some of the ways to remove rust from your truck and make it last longer.

How Often To Replace Brake Pads Of Your Truck?

In this guide, we will go through a guide on how to replace brake pads of your truck. Brake failure is a major cause of most accidents. In the United States, 300,000 car crashes result from brake failure. It is thus essential to protect yourself and other road users by maintaining your brakes.

The brake pads are one of the basic components of the braking system that are in pairs per wheel. The primary role of the brake pads is to press against the rotor to create friction to stop your truck. They are made of various materials such as metal, ceramic or organic materials. Its surface has a special material that creates friction when you press the brake pedal. 

Signs You Need To Replace Brake Pads Of Your Truck

Brake pads wear out with time, just like other mechanical parts of your truck. When worn out, they become less effective, making it difficult to control your truck. As a truck owner, it is necessary to perform a regular brake pad inspection to be sure they are working perfectly. If broken, you need to replace brake pads of your truck.

Apart from regular maintenance and replacements, avoid sudden and aggressive braking, as such habits reduce the lifespan of your brake pads. Here are the common signs that your brake pads need a replacement.

Grinding Noises

Braking should be as silent as possible, especially when driving at a lower speed. When you hear screeching noises whenever you gently press your brake pedal is an indication that the pads are worn out. The sounds result from the friction between the brake pad and the rotor. Address it as soon as possible. If you ignore it, your brake rotors will be damaged.

Your Truck Takes Time To Respond

Brakes should be very responsive, but when you press the brake pedal, but your truck takes time to stop, it indicates that your pads are worn out, and you should replace them. Such a problem can be dangerous when you need to stop abruptly. Consider checking your brake pads whenever you realize your truck is taking time to stop. 

Vibrating Brake Pedal

If your brake pads are worn out, the pedal will vibrate whenever you press them. The vibration usually results from damaged brake rotors that lead to uneven wear of the brake pads. When you feel such vibrations, you must check your brake pads and replace them when necessary. 

Warning Lights On The Dashboard

Modern trucks have brake pad wear sensors that will turn on the brake warning lights on your dashboard whenever the pads are worn out. The appearance of such light is a reminder that you should replace your brake pads.

When To Replace Brake Pads

After covering 50,000 to 70,000 kilometers, your truck will need new brake pads. But other factors, such as poor driving habits, can fasten the rate at which your pads wear out.

Conclusion

Truck brake pads are the braking system parts that are in friction with the brake rotors. Due to friction, it wears out and needs a replacement. When worn out, you will experience some of these signs. The lifespan of your brake pads solely depends on your driving habits and how often you use your truck. Shared in this guide is how to replace brake pads with ease.

How To Clean a Carburetor Of A Truck

Are you wondering how to clean a carburetor of a truck? A truck’s fuel system has several parts that play the role of storing and supplying the engine with fuel. The fuel mixes with air, and this mixture burns inside the cylinders to generate energy to get your truck moving. Carburetor plays the role of mixing fuel and air in the right ratios for the combustion to occur. Carburetors have been used for several years, even though modern trucks do not use them. Instead, they have an electronically controlled fuel injection system.

When dirty and clogged, the carburetor will not function effectively, which can interfere with your truck’s performance. Upon reading this guide, you will understand the procedure for cleaning your carburetor at your fingertips.

How To Clean A Carburetor of A Truck

To clean a carburetor of your truck, you will need:

Screwdriver set

Wrench set

Circular and flat wire brush.

Catch pan

Shop towels

Chemical dip.

Here is what to do after having all the necessary tools.

Remove the Carburetor from the Manifold

You can clean a carburetor when it is on the manifold, but this will not eliminate all the dirt. You might drop something, and it can be hectic to pick it up. After detaching the carburetor from the manifold, staff a clean rug to prevent debris from getting in.

Drain Fuel

Mixing air and fuel takes place in the carburetor, and it can’t miss some fuel. Before you disassemble it, consider draining all the fuel. To do this, place it upside down to let all the fuel flow out. To speed it up, you can cycle the throttle.

Tear Down the Carb

The process of tearing down the curb varies depending on the carburetor your truck uses. Therefore, there is no exact procedure for performing it. When tearing it down, track the procedure to know where each part comes from. Doing this will facilitate the reassembling process since each part has to go to its exact location.

Start with the Big Bits

Before dipping your carburetor into the chemical bath, remove all the heavy deposits on its surface. To do this, use a brass brush and carb cleaner, you will be saving time and preserving the life of chemical bath. 

Take a Bath

After removing the bulk of dirt, gently lower each part for a bath and soak them for 20-30 minutes. You can work on the parts in batches to speed up the entire process.  

Spry & Scrub

After removing the parts from the solvent, some areas will still have dirt build-up. Use carburetor cleaner and clean brass to scrub these areas. 

Blow Curb Cleaner

Carburetors have various holes and passages that can be filthy. Blow the curb cleaner and watch if it is coming out, if not, use a thin wire to clear the blockage in the holes. When every part is clean, reassemble your carburetor and fix it in the manifold.

Conclusion

A clean a carburetor of a truck, it will increase its lifespan as well as the performance of your truck. A clean carburetor will deliver the necessary air-to-fuel mixture ratio to the engine. The procedure in this guide is all you need to clean your carburetor at home. If you are unsure, consult a professional to do it for you. 

Basics of Changing Windshield Wipers For Trucks

Trucks perform better on both off-road and highways. When driving on a dusty surface or during the rainy season, the windshield traps water droplets and debris that interfere with your vision. The windshield wipers eliminate dust particles, water droplets, and other debris that may hinder the driver’s visibility.

Windshield wipers usually wear out as they perform their functions. When worn out, it will not wipe clearly. Therefore, changing the windshield wipers after 1 year is essential for consistent performance. You will be able to understand some of the basics of changing windshield wipers after reading this guide. 

Truck Windshield Wiper Problems

Windshield wipers perform simple functions with basic components but can give you a headache when faulty. Here are the fundamental windshield wiper problems you should be aware of.

  1. Streaking makes the windshield wiper smear water rather than wiping it.
  2. Noisy results from the rubber blade dragging against the windshield.
  3. The blade might sometimes jump across the chunks on the windshield without wiping them.
  4. A particular part of the blade may be properly functioning. Sometimes the bottom blade may be functional while the top blade does not wipe this is splitting.

What You Need to Change Windshield Wipers

Changing windshield wipers takes roughly 30 minutes, and it does not need any specialized skill. The procedure can sometimes be dangerous and messy. Before starting, wear safety glasses and mechanic gloves. Get a flathead screwdriver and a set of new windshield wipers. 

You will need a spacious and flat workspace like street parking, garage floor, and driveway. When performing this procedure on the street, ensure you are not committing any traffic offense. Your tools should be well organized and easily reachable to save time. 

Changing Windshield Wipers

After having all the necessary tools and the right windshield wiper for your truck, perform the below procedure to change the windshield wipers for your truck.

  1. Locate the center blade of your windshield and let it be perpendicular to the truck in an up position. 
  2. After letting them stand perpendicularly to your truck, you can unclip and unhook them to remove the wiper blades. Follow the manufacturer’s instructions that accompany. 
  3. Check around the new blade. If you spot any protective material, consider removing it.
  4. If necessary, disconnect or attach a different adapter. This varies depending on the blade which you have bought. 
  5. You can now install the new blade. When doing this, stop as soon as you hear a clicking sound or as per the manufacturer’s instruction on the new wiper blades.
  6. Reinstate the wipers onto the windshield and get into your cabin to test if the new wipers are effective by spraying some water on the windshield and letting the new blades wipe it. 

Conclusion

The windshield wiper has simple basic components that do not require any special skills, but when faulty, you will have the worst driving experience in any adverse weather. Before completely wearing out, you will notice some signs. Never ignore them, and consider replacing the windshield wiper blades for your truck as soon as possible. 

Replace Truck Parts – What Is The Best Time To Do It?

What would be the best time to replace truck parts? Even though you love your brand-new truck and take care of it, it is a machine with various parts. The function of these parts is what enables your truck to serve you. As such parts function, they are subject to wear and tear, and replacing them is inevitable. 

When To Replace Truck Parts

Most truck owners are unaware of and wonder when to replace truck parts. Different truck parts wear out at different times. As you read this guide, you get insightful information about when to replace various vital truck parts.

Battery

The battery ages after a few years, and if this happens, the performance of your truck reduces. The truck battery keeps charging and discharging and comes a time when it wears out and needs a replacement.

Generally, the best truck battery will give 4-5 years of service, so consider replacing your battery after every five years. It is essential to check your battery after every 12 months.

Tires

Tires are the most important part of your truck that are subject to daily wear and tear. The performance and safety of your truck depend on the condition and nature of your tires. It is thus essential to regularly check your tires and make necessary changes as you look to replace truck parts.

Ideally, the best quality tires should serve you for several years, but you should replace them as soon as they show signs of wear and tear. Various factors affect the lifespan of tires, such as driving habits and terrain. Therefore it is difficult to determine the exact time to replace your tires.

Brake Rotors

Brake rotors are a basic and essential part of the braking system that is attached to the wheels. The rotors are exposed to daily wear and tear. But, driving on worn-out brake pads reduces their lifespan very fast. 

You should replace your rotors after every 50,000 -70,000 miles. You can do this earlier if you hear squealing or grinding noises when you press your brake pedal.

Spark Plugs

Petrol engine trucks depend on spark plugs for combustion. They play the role of ignition and generation of necessary power that starts and drives your truck. If your truck does not accelerate properly, or the engine surges, consider checking the condition of your spark plugs. 

Generally, spark plugs will give you 8 years of service, but this depends on the type of truck you have.

Shocks and Struts

Shock absorbers enable the wheels to recover immediately after hitting bumps on the roads. Struts support the weight of your truck and determine how it handles while on the road. These parts offer different life guarantees. Essentially you should replace them after every 50,000 – 100,000 miles. You can also do it as soon as you experience unstable braking, poor steering, and stiff performance.

Conclusion

Other parts will require replacement apart from the parts mentioned above, like the windshield, transmission fluid, oil, brake pads, coolant oil, and air filters. You can check the owner’s manual to know the exact time to replace such parts. The guide will also let you know when to replace truck parts as part of basic service maintenance

Seasonal Maintenance Tips For Truck Owners

Scheduled seasonal maintenance is a practice you should heed if you want your truck to give a longer service. However, various seasons have various adverse effects on your truck. It is thus necessary to maintain and prepare your truck for seasonal changes. Here are seasonal maintenance tips worth knowing.

Spring

 It is essential to check your truck at the beginning of spring thoroughly. Here is what to do for a spring seasonal maintenance.

Body Cleaning

The exterior of the truck can be affected by the winter snow, and there are higher chances that you never washed your truck during winter. During spring, wash your truck and focus more on the underbody. The mixture of snow and salt can corrode your truck, the process of corrosion can be slow during winter, but the spring temperatures can accelerate the corrosion. Cleaning your truck will let you see the corrosion and repair them.

Tires

 All-season tires can endure the harsh winter. Consider checking their condition during spring. If they are okay, you can rotate them. Remove the snow tires at the onset of spring.

Brakes

At the beginning of the spring season, consider checking the condition of your brakes. The snow and ice put pressure on the brakes. If you press the brake pedal and hear squealing sounds, consider changing your brake pads.

Oil and Filters

Consider changing the engine oil and oil filter during spring since the engine will put more effort to function during the warmer season. Having fresh engine oil will increase the performance of your truck. A seasonal oil check ensures that it is not affected by moisture.

Summer

Summer is the second harsh season after winter. Check the following.

Truck Cooling System

Your truck will overheat due to increased temperatures. Ensure your cooling system works perfectly. Ensure the coolant is at the right level. No leakages should be at the radiator and the hoses. The radiator fans should be in good working condition.

Tires

Even though you will have all-season tires, regular tire check-up during summer is essential. Ensure your tires have the right pressure. It is more important to keep your tires at lower pressure. 

The AC

The air-conditioning system is vital during summer. Ensure it works since it will make your cabin conducive during hot temperatures.

Fall

If you adequately maintain your truck during summer, you will only have to do a little during fall as it is not very harsh, and your truck will not need any special maintenance.

Winter

Tires

Switch to snow tires to get the best performance from your truck.

Wipers

 The heat and dust during summer usually damage wipers. Replace the wiper blades and ensure they are working during winter.

Heater

Your heater is yet another thing that should be attended to as part of the seasonal maintenance. The heater stays longer without functioning, which can damage it. Consider checking its condition during winter. To avoid freezing, you must run a maintenance check on your heater.

Conclusion

Your truck is an investment that should be in proper working condition. Maintaining and servicing it is essential for it to run longer. Knowing what to do in various seasons will keep your truck in proper working condition in any season. The checklist in this article will guide you in proper seasonal maintenance for your truck. 

Cost-Effective Ways To Make Your Truck Go Faster

How do you make your truck go faster? Adjustments to your truck to fit your needs and become super faster cost a lot of cash due to the effects of films and TV shows showing the investment people put to increase horsepower and beautifying their vehicles. Therefore, truck owners must seek alternative ways of making their trucks look better and will make your truck go faster on the road. 

Altering your truck to improve its performance does not need to cost you up to the last cent in your pocket. You only need to perform some basic changes that will cost you a few dollars. These are essential changes to consider if you want to make your truck go faster at a lower cost. 

Lower the Suspension

Lowering your truck’s suspension not only makes it look pretty but will also make your truck go faster. Low suspension lets you corner with a lot of ease without pressing the brake pedal more often. The most cost-effective way of lowering your truck is by changing the leaf springs. Doing this, however, will make it difficult to slow down the truck. 

Remove the Big Wheels

Using bigger wheels improves your truck’s stability and shortens the braking distance range. However, the larger diameter implies that the wheel will be heavier, affecting your truck’s speed. It is thus essential to remove the big wheels if you want to improve the truck’s speed.

Reduce the Weight of Your Truck

Reducing the weight of your truck is one of the most cost-effective ways of increasing the speed of your truck. A lighter truck travels way faster than a heavy one. To make your truck lighter, consider stripping off the abundant weight on it. Doing this will make it run way quicker. 

Upgrade Your Brakes

Upgrading brakes is a major consideration when you want to make your truck move faster. You need to redesign the brakes because increasing speed strains the stopping mechanism. Consider installing race cushions, and if your pockets allow, consider installing better rotors. Remember to overhaul your brake hoses as well as the brake fluid. 

Change Air Filter

Air channel plays an important role in each vehicle as it is an ingredient in the combustion system. However, air that gets into the engine carries all sorts of debris. The air filter traps all the dirt and delivers clean air into the combustion chamber. As the air filter functions, it becomes clogged, and this deprives the engine of receiving an adequate amount of air. Regular changing of the air filter lets your engine receive abundant air that increases the performance of your truck.

Change the Spark Plugs

The spark plugs are some of the engine’s components that require regular changing. When your spark plugs are old, your truck will not be able to fire effectively. It will deliver a lot of fumes as well as the power of the engine will reduce. New spark plugs cost a few dollars and take less than 10 minutes to fix. In the end it will also make your truck go faster.

Conclusion,

A truck with good speed increases convenience, especially when you are in the delivery business. The above are some cost-effective ways to make your truck go faster. Never skip the regular engine servicing. Doing this gives your engine good health, thereby functioning effectively. 

Truck Tips – How You Could Unknowingly Be Damaging Your Truck

Today we will look at some crucial truck tips to get better with your vehicle. When driving your truck, it could be at risk of getting damaged without you knowing. Poor driving habits can reduce your truck’s life span and general health. Some poor driving habits are road-related, but some occur as a surprise. To maintain the good health of your truck and avoid being a regular visitor at the auto repair shop, keep reading this guide. You will learn some habits that are damaging your truck without your knowledge.

Sudden Braking and Accelerating

When doing urban driving, you do not need to press the throttle hard, as you could end up jamming your brake at the nearest junction. When doing frequent acceleration and braking, you will likely damage your brake pads and give them a shorter life span. Consider driving more consistently. This is one of the least know truck tips that can change a lot.

Pressing the Clutch Pedal When Your Truck is Stationary

When driving a manual transmission truck, pressing the clutch when the truck is stationary is not necessary. Doing this stresses the pressure plate, release arm, and bearing. With time, this can end up damaging your transmission system. Instead of pressing the clutch pedal, shift to neutral gear.

Not Applying the Emergency Brake

Ignoring the emergency brake is common among automatic truck owners who forget to use it after parking their trucks. Doing this not only puts your truck at risk of moving involuntarily, but it will slowly wear down its components. 

When you park your automatic transmission truck without the emergency brake, too much strain will be on the parking pawl, a small metal that locks the transmission and prevents the wheels from turning. When the parking pawl is worn out, the parking gear will not function.

Braking Downhill

Modern trucks do not need you to press the brakes to keep them steady when going downhill. Instead, shift to lower gears when going downhill. Over-depending on brakes when going downhill causes premature wear and tear to your brake pads. 

Ignoring the Warning Lights

Whenever any check light appears on your dashboard, consider taking your truck for a mechanical check-up as soon as possible. However, some truck owners ignore the check light as long as their trucks run smoothly. Checking the cause of the check light earlier will save you from expensive repairs in the future.

Speeding Over Potholes and Speed Bumps

When driving at night or under low visibility, you might hit potholes. But you can always avoid them. Frequently speeding over potholes and speed bumps can interfere with the wheel balancing of your truck and damage the wheels. Apart from the wheels, the suspension and its bushings are also at risk of getting damaged. Slowing down whenever you are approaching potholes and speed bumps is essential.

Ignoring the Service Schedule

Another of the commonly ignored truck tips is failing to schedule servicing and maintenance. Most parts of your truck need a regular check-up to ensure they are in good working condition. Ignoring the scheduled service maintenance can lead to expensive and severe damages.

Conclusion,

New trucks are expensive investments. If you are fond of any of the above driving habits, drop them. Knowing such habits is a step towards remedying the problem. Developing good driving habits will let your truck serve you for a long in good working condition. You will also be able to save the extra cash you spend at the auto repair shop. These truck tips are crucial towards getting better results from your vehicle.

Expert Brake Maintenance Tips For Your Truck

Brake maintenance in any vehicle is very important and should not be taken for granted. When driving or even parking your truck, you will need brakes. Brakes are lifesaving parts of your truck. They should therefore work effectively. Worn-out and faulty brakes are some of the common causes of road accidents. However, the role the brakes play exposes them to regular wear and tear. Regular maintenance of brakes enables them to work effectively. Here are some of the expert brake maintenance tips for your truck.

Check the Brake Rotors

When checking your brake pads, consider checking the brake rotors since the two are in regular contact whenever you press the brake pedal. Check the surface of your rotors. If you note grooves on them, it means that the brake pads are eroding the rotors. 

If the damage is mild, grinding the rotors will make them smooth. But if the damage is extensive, consider buying new rotors.

Inspect the Brake Pads

The brake pads take all the heat whenever you press the brake pedal. This should be the first thing in your brake maintenance. They, therefore, wear out at a very high rate. In some trucks, you can see the brake pads from the outside, but in some, the pads are hidden.

It is essential to check the condition of your brake pads every 6,000 miles. To check the brake pads, you have to remove the tires. The pads should have even surface wear and be 5 millimeters thick. If they are worn out, consider fixing new ones. 

Inspect the Brake Lines and Master Cylinder

The brake line and master cylinder are two essential parts of your truck braking system. Their primary role is to transfer the brake fluid from the reservoir to the brakes. When inspecting the lines, check for leaks that usually occur at the joints between the master cylinder and the lines. 

Check the Brake Fluid Levels

One of the fluids you should regularly check is the brake fluid. You must first know where your fluid reservoir is to check your brake fluid. The reservoir has marks that can help you to determine if you have the right quantity of brake fluid. 

Besides checking if you have the right brake fluid levels, knowing if you are using the right brake fluid is another crucial thing when doing brake maintenance. You can know this by checking the owner’s manual, which clearly states the right type of brake for your truck.

Replacing the Brake Fluid

Mostly, we do top up the brake fluid if their level drops. Doing this can infiltrate the brake fluid, damaging the master and the wheel cylinders.

It is thus necessary to replace your brake fluid after every two years or after covering 25,000 miles. Before changing the brake fluid, locate where the bleeder screw is, usually at the back of the brakes. 

Once you open the bleeder screw, the old fluid will drain out. Never open the bleeder screw if you do not have the right tools, as this can cause serious damage. 

Conclusion

Signs of faulty brakes, such as squealing sounds, soft brake pedals, and hard brake pedals, are clear signals that your brakes need maintenance. Truck brakes are complex, and you should consult a professional mechanic to fix them when faulty. When an expert is performing brake maintenance, be attentive to what various parts of the brake look like when worn out.

Crucial Truck Tire Changing Tips To Keep In Mind

What are some of the crucial tire changing tips to note? Your life and that of other road users depend on the nature and the type of tire your truck uses. Pay attention to shredded or punctured tires, as procrastination when replacing them can lead to serious road accidents. 

Fortunately, it is very easy to change a damaged tire, but we need the right tools and experience to do this. These are the dos and don’ts to remember when changing truck tires. 

Things To Do When Doing Tire Changing

Change Tires on an Open Space

Tire changing in an open and large space allows you to move around easily with your tools. If your garage or driveway is large, consider changing your tires there. If you have limited space, consider taking your truck to an auto repair shop.

Placing the Jack

Trucks differ based on the manufacturer and the model. It is thus essential to know the exact position to place your jack. Before changing the tires of a new truck, consider checking the owner’s manual to know the exact place to place the jack. Before using the jack to lift your truck, ensure it is firmly placed, so it does not slip off.

Have Two Pairs of Jack Stands

When lifting your truck, jacks can collapse. Although a single jack is just enough when changing tires, consider using at least two for assured support and appropriate lifting of your truck. 

Apply Brakes

Before working on tires, ensure your handbrake is engaged. Your truck may move in the process of changing tires, which can lead to severe injuries.

Use the Wheel Chocks

Sometimes gravity can make your truck move, or the brakes can fail. Using a wheel chock that will hold your truck stationary is essential. An 8-inch wooden or rubber wheel chock will appropriately hold your truck.

Things To Avoid When Changing Tires

Never Jack Your Truck Before Loosening the Tire Nuts

If you try to loosen the wheel nuts after jacking your truck, the wheel will spin, and the nuts will not become loose. You can also sustain injuries in the process. Consider loosening the wheel nuts before jacking your truck.

Never Tip Your Truck To One Side

Tipping your truck to one side and balancing it using various jacks is dangerous. Doing this is risky and can cost your life. If you do not know how to change tires, take your truck to the nearest auto service shop.

Never Rely on Your Jack

When working under your truck, never trust your jack. Several deaths and injuries have resulted from slipping jacks. Consider using an extra stand after lifting your truck using a jack.

Never Install Dry Nuts

Before installing and tightening your nuts, ensure they are well-greased. Doing this will prevent them from rusting, and they will easily penetrate as you tighten them.

Conclusion

Tire changing is one of the basic truck maintenance that you should know. Although removing and replacing truck tires is simple and basic, the process is extremely risky and can claim life if not well done. Practice the above dos and don’ts when handling the tires of your truck. Besides the tire changing tips, consider inspecting your tires before and after using your truck. 

How To Improve Your Truck’s AC Performance

Ever thought if there was a way that you could improve your truck’s AC performance? Truck owners living in the south can only imagine driving with an AC. During summer or hot weather, the air conditioning system offers cooling within the cabin and plays a vital role in preventing heat-related illnesses like heatstroke.

There are measures you can practice to improve the cooling effectiveness of your truck’s air conditioning system. Below are some of the tips worth putting into practice.

Always Start the AC When Driving

Most truck drivers habitually start their AC when their trucks are not moving. Doing this wastes fuel as the AC functions well when driving. If your truck is in motion, the compressors can run faster with the speed of the crankshaft. 

If you want to cool your truck faster before driving, consider opening the windows and the sunroof.

Check the Refrigerant

The system refrigerant reduces gradually when you regularly use the AC to cool your cabin. A refrigerant shortage boosts your AC performance when the temperatures are high. It is essential to check your refrigerant after 6 to 12 months.

Ensure the AC Condenser is Clean

The AC condenser is at the front of your truck and behind the grill. Its primary role is to re-cool the refrigerant as it expels the heat to the passing airflow. However, the airflow path can be clogged by dirt and debris, reducing the condenser’s efficiency. Consider checking and periodically cleaning it.

Check the AC Filter

Filters usually become dirty and worn out, leading to the breakdown of your truck’s air conditioning system. The filter traps foreign objects like dust, dirt, and pollen. With time they become clogged, and you will have to replace them.

If you do not replace your AC filter, the AC system will work harder to push the air through, leading to increased fuel consumption.

Regularly Service Your Truck

Trucks AC performance is best under good maintenance. For the AC of your truck to function effectively, take your truck to professionals for inspection and servicing. The professionals will test and determine if various parts of the AC are working perfectly. Check any damage or leaks and fix them.

Park Undershade

Try as much as possible to park your truck under shade. Most of the heat that gets into your cabin is usually in the form of radiation. If you can’t find shade to park your truck, slightly open the windows provided where you park is safe. Opening windows slightly allows air to circulate in your truck, and heat will not accumulate.

Install Window Shades

Window shades play a vital role in limiting the heat in your cabin. Before installing window shades, check the ones your local laws recommend.

The window shades prevent sunshine from getting into your cabin, and this will let your AC work less to keep the temperature cool. 

Conclusion

Despite the higher temperatures, following the above tips will help keep your truck’s cabin cool and comfortable with improved AC performance. Your fuel expenses and AC repair costs will greatly reduce in the long run. The trips you make to health facilities will also reduce since you will be free from heat-related illnesses. 

Crucial Radiator Maintenance Tips

What are some of the trck radiator maintenance tips to know? Engine overheating is a common cause of engine failure in most trucks, especially diesel-powered engines. The radiator cools the engine and ensures it is in top-notch working condition to prevent it from overheating. It is thus essential to ensure that your radiator is in good working condition.

What is a Radiator?

The internal combustion engine burns fuel to generate power. The combustion, together with the movement of the engine parts, generates a lot of heat. Thus, it is essential to dispense the engine’s heat and not compromise its function. 

The radiator has various parts like the fan, thermostat, and fine metal that help it to function effectively. If any of these parts malfunction, the radiator will not be able to function effectively, and your engine will heat up. Here are some of the radiator maintenance tips worth knowing. 

Avoid Overloading Your Truck

Each truck is designed to carry a certain load depending on its engine size. It is referred to as payload, that is the maximum weight a truck can carry, excluding its weight. When you carry more load in your truck than its payload, how it performs will be affected. 

Overloading your truck stresses the engine more, and the cooling system will also strain to maintain the optimum temperature for your engine. Every cooling system is designed per the payload of every truck and overloading your truck can lead to radiator malfunction. This is one of the crucial radiator maintenance tip to keep in mind.

Radiator Leakage

Leakage is a common problem with most radiators, and regular servicing prevents your radiator from leaking. Leakages result from broken seals, hoses, or gaskets. Such parts develop small cracks with time and get worn out, which leads to radiator leakage.

Leakage in your radiator indicates a damaged component. Consider replacing it, and failure to do so can reduce the level of the coolant, resulting in engine overheating.

Use the Right Coolant

Various coolants in the market have various formulas and characteristics. Consider using the correct coolant when changing or topping up your coolant, and avoid mixing different coolants. Using the right coolant will let your radiator function as it should. 

Regularly Inspect the Levels of Water

Radiator water can reduce due to leakages that result from cracks on hoses or joints. Leakage reduces the coolant level, making your radiator unable to function effectively. Driving a truck with little or no water can lead to serious consequences. It is, therefore, essential to regularly check the levels of water and top it up when it is low. 

Regularly Check the Hoses

Another crucial radiator maintenance tip is to check the hoses. The hoses provide a means by which the coolant moves between the radiator and the engine. The hoses are thus the most important element of the cooling system. A radiator has upper and lower hoses that are made of rubber. The hoses develop cracks with time, and it is thus essential to check and replace them if you notice any cracks.

Conclusion

The radiator is the basic component of the cooling system. Like other parts, it needs regular servicing and radiator maintenance. You can check the coolant level and top up on your own, but leakages need a professional mechanic to check and identify problems with other parts, like the thermostat. 

Common Gearbox Problems In Trucks

The gearbox is the most important part of the transmission system, but there are many gearbox problems out there. The delivery of power from the engine to the wheels is a process that involves several mechanical components, such as the gearbox. The gearbox does its role by rotating continuously to transmit the right amount of power to the wheels.

The rotation and grinding expose the gearbox to wear and tear that malfunctions. Before malfunctioning, the gearbox develops several problems, and here are some common gearbox problems.

No Acceleration

Among top gearbox problems has to do with acceleration. Lack of acceleration is a common gearbox problem your truck will experience. When driving, sometimes you will realize that your truck takes time to accelerate once you shift gears. The delay usually exists in manual transmission trucks but should not take more than one second. 

You will experience this problem when your clutch’s components are faulty. Due to this, your truck’s clutch will be active even after shifting and this minimizes power transmission to the wheels. 

Fluid Leakage

Like any other rotating truck component, the gearbox requires fluid for lubrication and smooth running. When you notice drops of liquids under your truck after parking for long hours, it is likely to be the transmission fluid leaking. 

Consider finding out the cause of the leakage and top up the transmission fluid as soon as possible. The transmission fluid never evaporates and thus should be at a proper ideal level for the lubrication process to take place effectively.

Truck Shakes and Produces a Grinding Noise When Shifting Gears

Under normal circumstances, your truck should not be shaky when shifting gears. If such happens, your gearbox is likely to be faulty. If your clutch plates are worn out, your truck will shake whenever you completely press down the clutch pedal. 

Slipping Gears

If you own a manual transmission truck, the gears should work only when you command them. Sometimes when you shift gears and press the gas pedal, your truck might jerk off and fall back to the previous gear. Sometimes, the gears can shift into neutral. 

Slipping gears damages the essential components of the gearbox and can also endanger your life. Factors such as a damaged shift fork can lead to gear slipping. When the forks are damaged, they will not be able to properly lock to the correct gear, resulting in the transmission shifting back. 

Burning Smell

When driving your truck and you start feeling a burning smell accompanied by poor gear shifting, there is a high probability that the smell originates from your gearbox. The smell usually results from the overheating transmission fluid. The role of the fluid is to cool down the heat from the friction of the gearbox components. When the heat is too much, the transmission fluid becomes less effective and accumulates more heat which leads to the production of a burning smell when driving. 

Conclusion

The gearbox is an important component of the transmission system. This part ensures that the wheels receive the right amount of power under various driving circumstances. Gearbox usually wears out with time. When your gearbox wears out, you will experience the problems mentioned above. 

Crucial Things To See In An Engine Of An Old Truck

Purchasing a used truck is a challenging task because you are dealing with an engine of an old truck. Generally, it takes a lot of work to evaluate the actual value of a used truck. However, the value solely relies on the condition of its engine.

The engine’s performance is the major factor every truck buyer considers before buying a used truck. It is, therefore, essential to check the health of the engine. After reading this guide, you will be able to know some of the crucial things to see in an engine of an old truck. 

What to Check to Know the Condition of the Engine of An Old Truck

It is easy to check the condition of a truck engine. You can do this alone, but for better results, you will need assistance from a professional mechanic. Here is what to check to determine the condition of the engine of an old truck. 

Check for Signs of Weak Truck Engine

It is easy to determine if a truck engine is underperforming or weak. Such engines have signs like the production of unusual noises, loss of power when you press the gas pedal, engine stalls, poor gas mileage, and odd smell. When you witness any of these signs from an old truck is a clear indication that the engine is getting weak.

Service History

When buying a used truck, consider asking for service history. A truck with a clear service history is ideal and will show how to maintain it. Trucks usually have a fixed service interval. Consider checking if the owners heed these fixed intervals.

The service history will let you know if the truck has been serviced at proper intervals. 

Inspect the Odor from the Engine Of An Old Truck

You should worry when the old truck’s engine bay produces strange smells. Such smells indicate that the spark plugs might be faulty or the engine is burning coolant. A strong smell from the engine is an indication of poor truck maintenance. 

Seek the Services of an Expert

It is not easy to check the health of a truck engine and determine its performance. Performing all these can be hectic and stressful alone. Consider seeking the services of a professional mechanic who will help you to determine the health of the engine. 

Inspect the Bottom of the Truck

Another sure way of checking the health of your truck is by inspecting the beneath of the old truck. Doing this will enable you to spot leakages, spots, and strains. If you notice any of these is an indication of a problem with the engine compartment. 

Belts and Hoses

when checking the belts and hoses, rely on the service history as it contains data about their replacement. Apart from the service history, perform a physical inspection on the belts and hoses to determine if there are cracks. Doing this will let you know when to replace these parts.

Conclusion

Old trucks are fragile, and you should be extremely keen when buying one. The engine is the most important point to pay close attention to. This part can be hectic to repair after buying an old truck. When inspecting the engine of an old truck, remember never to forget to practice the tips in this guide. 

Important Accessories To Always Have In Your Truck

What are some important accessories that you must have in your truck? Trucks are more than just a means of transport for most of us. They are like a second home since we spend more time on them. It is, therefore, essential to make your truck more comfortable to stay in as it takes you from one point to another. To achieve this, you much have some essential accessories.

Important Accessories To Always Have In Your Truck

Here are some accessories you should always have in your truck to make your life easier.

Mobile Charger

Smartphones are very important gadgets in our lives. Some phones drain power very fast. When traveling, phones come in handy during emergencies and when you need direction. A smartphone will also entertain you while driving. All these activities will drain your phone’s battery, and you will need to charge it. 

You will need a mobile charger in your truck to charge your phone when its battery drains.

A Portable Tyre Inflator

Another important accessory that you must have in your truck is a portable tire inflator. The tire inflator can rescue you in the middle of nowhere when your tires run out of pressure. It is easy to repair a tubeless tire, and a portable tire inflator will come in handy.

The best portable tire inflator will take 10 to 15 minutes to inflate a flat tire. Having a portable tire inflator will save you from the long queues at the filling stations to check the pressure of your tires. 

Pepper Spray

Safety and security are important when traveling. Pepper spray is another essential truck accessory that you should never miss. Pepper spray is not only important for female drivers. Anyone can use it in an emergency and in self-defense. You can keep it in the door pocket, which you can access when necessary. 

Mobile or GPS Holder

Mobile phones perform various roles, and you can use them as a navigational tool when headed to unfamiliar routes and directions. Although it is not recommended to look at or use the mobile phone while driving, you may need to look at it more often while at the steering wheel. 

To effectively use your mobile phone as a navigational tool, consider having a phone holder that will let you see your phone and the road clearly while driving. There are various types of mobile phone holders. The ones with the suction capability fit well on the windscreen, while the magnetic ones fit well on the dashboard. 

Air Fresheners

The air inside your truck come sometimes become terrible. But when your cabin smells nice, you will feel confident and good in your truck. Consider investing in the best freshener for your truck that will do away with all the bad smells from your truck’s interior. 

Conclusion

Apart from the above accessories, you can as well have a special car cloth that you can use to wipe out dirt from inside your truck. A tow hook and torch, especially when going for long trips. The hook will help you when you need to tow your truck, and also, remember to check on the condition of your spare tire before you start driving. With these accessories in your truck, you should be good to go.

Tips To Defog Your Truck When Driving In The Rain

As a truck driver, you require proper visibility for safe driving and a defog is sometimes necessary. Various factors, such as mist, fog, and condensation, reduce your visibility. While on the road, you will encounter any of the causes of poor visibility. It is, therefore, essential to know how to eradicate factors that hinder visibility.

It is unsafe to drive when it is raining as rain also reduces visibility. Apart from reduced visibility, rains make various driving surfaces slippery. Your truck can slide off the road due to reduced traction. Upon reading this guide, you will be able to understand various tips you can use to eradicate foggy windshields when it is raining. 

How To Defog Windshield When It Is Raining

It feels bad when it is heavily raining while driving your truck then you realize that your windshield can no longer offer you proper visibility. Your windshield will become foggy due to the difference in temperature inside and outside your truck. Here is what to do to defog your windshield when it becomes foggy.

Open Your Windows

When fogging reduces your visibility, it means your cabin is humid. In such a situation, slightly open your windows for the cold air outside to rush in and do away with the humidity inside your truck. The removal of the humid helps in eradicating the fogging on your windshield. 

Increase Heat In Your Cabin

When it rains, you will feel cold. Therefore a warm cabin will make you feel nice. Increasing the temperature of your cabin will not only give you a nice feeling, but the hot air will eradicate the moisture in your truck. The fogging on your windshield will reduce as the hot air collects moisture.

Turn On Your AC

It is weird to use the air conditioner when it is raining. The primary role of the AC is to cool the cabin during the winter season. But when you cannot see clearly due to a foggy windshield, the AC comes in handy. The cool air from the AC will collect moisture inside your truck hence helping defog it. As this happens, the moisture accumulated on your windshield will reduce. 

Avoid Air Recirculation

Air recirculation happens when the air in your cabin cannot escape. Instead, it keeps circulating within the cabin. As air recirculation occurs, moisture fills your windshield, which reduces visibility. You can eradicate air recirculation by using fresh air mode. Doing this will reduce the circulation of mist inside your truck. 

Apply Shaving Cream

A thin layer of shaving cream on your windshield will act as a barrier that prevents moisture from accumulating on your windshield. To do this, consider taking a little shaving cream and applying it all over the windshield using a clean towel from the interior. Use another dry towel to buff the windshield to remove the shaving cream’s residues. After doing this, no residue of the shaving cream should be visible on your windshield. 

Conclusion,

During the rainy season, the best way to eradicate foggy windshields is by investing in a heated windscreen. Letting air circulate inside your truck and using the AC effectively are other methods. Consider maintaining your HVAC system to prevent moisture accumulation on your windshield. 

Battery Leaks – What To Do If Your Battery Is Leaking

Have you ever experienced battery leaks? The battery is an essential part of your truck’s electrical system. It does the role of storing power that is necessary when starting your truck. Putting your eye on your battery more often is the best way to ensure it is properly working. Regularly checking your battery will enable you to determine whether it is leaking and take necessary action before it worsens. Upon reading this guide, you will be able to know the common signs of a leaking battery and what to do when your battery is leaking.

Signs of a Leaking Battery

Here are various signs of battery leaks.

  • A smell of a rotten egg from the battery.
  • You will notice corrosion, especially around the terminals of your battery.
  • The casing of your battery looks warped or bloated.
  • When your battery is always wet,
  • The level of acid is always low.

What To Do In Case Of Battery Leaks

Leaking acid harms your truck, your health, and the environment. Your truck can have various leaks, including brown liquid in the truck battery and red or white stuff leakage. All these are indications that the performance of your battery is weak. 

Consider taking immediate action when you notice signs that your battery is leaking. Doing this will either help in rescuing the condition of your battery or even disposing of it before it starts to interfere with other parts of your engine. Fixing a leaking truck battery is not a complex process, but it is essential to let a professional do it for you. Here are what you will need to fix a leaking battery.

  • A plastic pail or basin
  • Baking soda
  • Sealant
  • Sandpaper
  • Epsom salt

After assembling the above tools, this is what to do when your battery leaks.

  1. Consider uncapping the battery post before you start working on it.
  2. Transfer all the electrolytes from the battery into the plastic pail or basin. Be careful when doing this because the electrolyte itself is acidic and can harm you.
  3. Neutralize the sulphuric acid in the plastic pail using baking soda. 
  4. After emptying all the electrolytes from your battery, use sandpaper to scrab the cracked area until it becomes smooth and the cracks are visible.
  5. When you can see the cracks, apply sealant on them and give them two hours to dry before touching them.
  6. Reconditioning the electrolyte is another event in this step. As you do this, you will need three cups of heated distilled water (150F).
  7. Dissolve a cup of Epson salt into the heated distilled water and let the solution heat.
  8. Pour the cool solution into the electrolyte. After doing this, transfer the electrolyte into the battery.
  9. Consider wiping any spillage from the surface of your battery, as this can cause corrosion if left.
  10. Put back the caps on the terminals and ensure they are tightly held. 
  11. Gently shake your battery for at least 5 minutes and let it charge for 36 hours.

Conclusion,

Whenever you note that your battery is leaking, consider taking immediate action. You can either fix it with a professional’s help or dispose of it. If your battery has persistent issues, consider calling a professional to check it.

How Often Should You Service A Mini Truck?

Just like other trucks, you need to service a mini truck if you are to get good service from it. Every mini truck manufacturer will advise you to stick to the maintenance schedule if you want it to run smoothly. You may wonder when to service your mini truck, the cost, and what is involved during the procedure. Here you will get the information you need to know about mini truck service.

What & Why Is It Necessary To Service A Mini Truck?

Mini truck servicing involves inspection of the engine oil and filters and replacing them at a fee. Your mechanic will later inspect your mini truck to determine the condition of every part. Upon completion, your mechanic will recommend the parts you need to change and the cost of each part.  

How Often Should You Service A Mini Truck?

If you have just bought a new mini truck that is within the manufacturer’s warranty, consider sticking to the manufacturer’s service schedule. Doing this will keep your warranty valid. Older mini trucks also enjoy benefits from regular annual servicing. When properly maintained, the mini trucks drive smoothly for a very long time.

Proper servicing of your mini truck and keeping a detailed service history preserves its value when you sell it. You can achieve this by performing baseline maintenance, condition-based, and interval-based servicing.

Baseline Maintenance

Baseline maintenance, also known as regular servicing, starts with all the common things you will have to maintain in your mini truck, like changing the engine oil and filters. Baseline maintenance takes half a day and costs between $180 to $350, depending on the quality, type, and amount of oil your mini truck needs.

The price for baseline maintenance also varies depending on the quality, the type of oil, and the filters you opt to use. Generally, most mini trucks should undergo baseline maintenance after every 10,000km. During baseline maintenance, your mechanic will have ample time to inspect your mini truck and give you appropriate advice.

Condition Based Servicing

There are certain parts of your mini truck that you can wait for to show signs of wear and tear to replace them. For example, you will hear a squealing noise when your brake pads are worn out and need replacement. The brake rotors, engine mounting, timing belt, chain, tires, and radiator are some parts that will send you a warning when they need servicing. 

Interval Based Servicing

Consider servicing some mini truck parts pre-emptively because their failure is sudden and will not give any signs or symptoms. Failure of such components can lead to accidents or damage to your mini truck. 

The brake fluid, spark plugs, spark plug coils, battery, and transmission fluid are some parts that will never show any sign of wearing out, but the worst will happen when worn out. Consider checking and changing these parts as per the manufacturer’s instructions. 

Conclusion,

Your mini truck needs regular servicing to be reliable and give you a long service lifespan. Most mini truck manufacturers recommend that you service a mini truck after covering a specific mileage or when it starts showing some signs. During servicing, your mechanic will perform a thorough inspection to identify the parts that need servicing. 

Starting A Truck After A Long Time

Have you ever tried starting a truck after a long time and realized that it doesn’t start well? Trucks are fascinating vehicles that everyone aspires to have. Some truck owners have more than one truck or a truck, and other cars may be SUVs, sedans, or sports cars. Owning up to one vehicle can make you not regularly use your truck. You may have traveled and left your truck parked for a long time. Consider the following steps to start your truck safely when you need to use it. 

Starting A Truck After A Long Time

Here are some considerations when you are starting a truck that has been sitting idle for a long time.

Check the Level of the Engine Oil

Before you ignite your truck after sitting for a long time, look underneath for spills and leaks. After doing this, check the level of the engine oil using a dipstick and top it up when necessary. You can start the engine if your truck has the correct engine oil.

Check the Brake, Clutch, and the Transmission Fluid

The brake, clutch, and transmission fluids are essential for the smooth running of your truck. If your truck has been in the garage long before starting the engine, consider checking the level of these fluids. There is a chance of these fluids reducing if there is a leakage within the system. Ensure you have the right level of brake fluid. Call a professional to check the level of the transmission and clutch fluid. 

Check the Coolant Level

Before you start a track after a long time, consider checking the level of the coolant and ensuring it matches the minimum mark in the reservoir. Low coolant can lead to engine overheating when you start your truck.

Check the Condition of the Belts, Hoses, and the Wires

Your truck has belts connected to various pulleys and hoses that transport the engine’s coolant, air, fuel, and other fluids. The electrical system also has various wires. When your truck has been at the parking for longer, it is essential to check the condition of the belts, hoses, and wires before starting the engine. You can replace any of them if you note damage or cracks.

Never Crank Your Engine If It Does Not Start

Sometimes your engine might fail to start when you ignite it. If this happens after your truck has been parked for a long time, the battery voltage might be low. A battery with low voltage will not provide adequate power for the starter motor to rotate the crank that later fires up the engine. If this happens, the dashboard lights, horns, and wipers will function normally. 

Multiple cranks can completely drain your battery. Consider jump-starting your truck when it does not start on the first ignition attempt.

Check the Condition of the Tires

Your truck has stayed for a long without moving, so it is essential to check if the tires have the right pressure. A visual examination will determine whether your tires are over or under-inflated. If the tires are deflated, never drive, but inflate the tires first. You can keep driving your truck if it has run-flat tires. 

Conclusion

The above tips will help you to start a truck and get your truck running to normal after a long time. If you cannot perform them on your own, seek the services of a professional mechanic. When driving after a long time, consider starting at low speeds before speeding. Observe the traffic rules and avoid unnecessary usage of the horn. 

Truck Collision Repair Myths That Are Common

Apart from damaging your truck, a collision can leave you with trauma that will take time to heal and a hefty repair cost. This guide takes you through some collision repair myths. But stress is the killer package after a collision, and it is mainly fuelled by rumors from various individuals and even close family members. Here are some of the truck collision repair myths that are common.

After Collision, Only Repair Your Truck At The Insurance Approved Repair Shop

When involved in a collision and you want to repair your truck, it is not necessary to use the repair shop recommended by your insurance company. You can seek the services of any of your preferred repair shops. But it is essential to consider the recommendations from your insurance company. Doing this will facilitate the process of settling down the issue.

Consider the fact that not all repair shops accept insurance compensation as such compensations take time to materialize. The compensation process will be seamlessly easy when you work with an insurance-recommended shop.

Your Insurance Company Covers All The Repair Cost

Depending on the nature of the cover for your truck, after a collision, many will comfort you never to worry because your insurance policy will cover all the repair costs, and you will not have to dig into your pockets. Such is a myth since the insurance company will cover the repair cost if it exceeds the deductible amount. Under such circumstances, the amount you choose to be deducted for your cover will play a greater role.

If you choose a higher deductible amount, you are more likely to receive lower insurance rates. The deductible amount proves to be a problem regarding collision repairs. You might cover all the repair costs. 

You Will Get the Best Repair Services Through A Dealer

Using a dealer or going directly to an independent repair shop does not affect the nature of the service you will receive. It is a false belief that most dealers have or know the best repair shops they can contact to repair your truck in case of a collision. 

Several repair shops have similar facilities, equipment, and skilled personnel to repair your truck after a collision. They all have equal access to OEM parts. Therefore, there is no need to choose to repair your truck through a dealer. Many people recommend dealers because several auto manufacturers offer them certifications. You will find that dealer with the certification of offering truck collision repairs. 

You Have To Consider Multiple Estimates

Most insurance companies will compel you to seek truck collision repair estimates from at least three repair shops. However, the law does not oblige you to do so. Instead, consider taking an online search and recommendations instead of stressing yourself to visit the repair shops physically. You can decide to choose the repair shop that offers the services that suit all your needs.

Conclusion,

Various myths accompany truck collision repair. Every individual will tell you what they know when repairing your truck. It is essential to research and get advice from experts. Doing this will guide you to doing the right thing after a collision. The above myths will save you from messing up when repairing your truck after a collision. 

6 Easy Ways To Reduce Truck Emissions

Is there a way that one can reduce truck emissions? Personal vehicles and trucks contribute 20% of the emissions in the United States. But, such emissions cause more harm to the environment. Due to the risk of emissions, it is a requirement by the United States government that older trucks have to pass an annual emission test for them to remain roadworthy. 

To pass the annual emission test, you must prepare your truck and ensure its emissions are greatly reduced. However, you can reduce the emissions from your truck in these 6 easy ways.

Checking the Tires

When your tires are under-inflated, your truck will consume more fuel, leading to higher emissions. Under-inflated tires offer more rolling resistance. The engine will have to burn more fuel and air to produce the needed power to maintain the speed of your truck. 

Consider checking the pressure of your tires after every two weeks. Ensuring that your tires have the right pressure lengthens their lifespan. 

Perform Regular truck Service

Regularly servicing your truck helps keep it in mint condition and will burn as much fuel as possible to generate the necessary energy. When your truck is well-serviced, it will be safe for you and other road users. During the routine service, consider checking the brakes, the coolants, the oil, and the filters.  

Never Haul Excess Weight

When hauling excess weight, your engine will work extremely hard to generate the energy to move your truck together with its weight. Hauling more weight increases the rate at which your truck consumes fuel. More consumption leads to more emissions. Reducing the load that your truck hauls not only reduces its emissions but also gives your engine a longer life span. 

Always Drive Smoothly

If your foot spends more time on the fuel pedal, your truck will burn more fuel leading to higher emissions. It is, therefore, essential to driving smoothly and carefully. Doing this will least strain your engine and reduce its emissions.

Use the Right Engine Oil

When changing engine oil, consider using the right quality that your truck manufacturer recommends. The engine oil plays the role of lubricating, cooling, and reducing friction in various moving parts of the engine. The right engine oil ensures that your engine is running smoothly and boosting its performance. An engine with optimal performance has minimal emissions.

Use Fuel Additives

If your truck is old, consider mixing the right fuel additive in your gas tank. Doing this will boost the performance of your truck and also help reduce truck emissions. Apart from boosting the performance, it will also reduce the emission of harmful gases to the surrounding. Apart from the above, fuel additives also prevent the fuel injectors from being clogged. 

Conclusion

Truck emissions are harmful to the environment. Therefore EPA has set the standards that every motor vehicle has to comply with in terms of emission. Apart from the EPA regulations, cleaning and reducing your truck’s emissions will help keep your surroundings safe and clean. Consider putting into practice the above tips. Doing so will ensure that reduce truck emissions and minimal harmful gases to the surrounding. 

Secrets To Ensure Truck Engine Goes a Long Way

A truck engine is the heart, brain, and powerhouse of the vehicle. If it malfunctions, your truck will become useless. A truck is the most significant investment for everyone. You must take care of its engine to give you a high return on investment.

A healthy truck engine in good working condition will not only save you money but also boost the reliability of your truck. Consider taking your truck to a specialist for a checkup whenever your engine starts to malfunction. 

An engine might look like a single big section, but it has various components that work jointly to generate power for your truck. It is thus essential to regularly service your engine to give it a long lifespan. Here are the secrets to practice to give your engine the longest lifespan.

Never Skip Oil Change

The truck engine has various metallic components that rub against each other as the engine is functioning. The rubbing generates friction that can tear and wear engine parts. Apart from tear and wear, friction generates heat. The engine oil plays the role of lubricating all the moving parts within the engine. It also absorbs heat from such parts. Another crucial role of engine oil is cleaning the engine parts. 

As the engine plays its roles, it becomes dark, sticky, and less effective and unable to perform its roles. Such happens after a specific mileage, and it is essential to replace your engine oil after 3-6 months, depending on how often you use your truck. When changing the oil, consider replacing the oil filter too. Doing this increases the lifespan of your engine.

Check the Condition of the Spark Plugs

Ensure your spark plugs are well channeled and clean to prevent dirt and debris from finding their way into the combustion chamber. To achieve this, consider disconnecting your plug’s lead and cleaning the area around the spark plug to eliminate any debris that can get into the combustion chamber when removing the spark plug.

Remove the sparkplugs and inspect whether the electrodes are burnt or have cracks. If it has cracks or the electrodes are burnt, consider replacing them. Such a procedure might be time-consuming, but it will improve your truck engine performance.

Clean Your Engine

Like other parts of your truck, the engine needs to be clean to work perfectly. Depending on where you do regular driving, your engine is prone to catching dirt. It is thus essential to keep it clean.

When cleaning your engine, consider using a degreasing agent to clean the outer part of your engine. You can use a vacuum cleaner to blow out dust and debris from the engine casing. The engine’s design keeps dirt from accessing the inner part, so you will not need to clean it. But, if you hear unfamiliar noise, a strange smell, or even smoke from your engine, never drive your truck. Instead, call a professional to determine the cause.

Conclusion,

How powerful your truck depends on the health status of its engine. As a truck owner, the health of your truck engine will depend on how to take care of it. When you take care of your engine, it will serve you for eternity. Consider following the above secrets to give your engine a longer lifespan.  

Crucial Tips When Diagnosing Brakes Of A Truck

Brakes are an essential part of your truck, but how do you go about diagnosing brakes of a truck? Is it easy or complicated? Your safety and that of other road users rely on the brakes’ effectiveness. Most road accidents result from worn-out brakes or brakes that are in poor condition. However, there are ways you can use to determine if your brakes have problems or not. Here are the tips to rely on when diagnosing brakes of a truck.

Grinding Sounds

Brakes should function in silence. But when your brakes produce a grinding sound is an indication of a problem. It could be the caliper or the metallic part of the brake pads. When such happens, consider checking your brakes as soon as possible.

Squealing Sound

If you apply brakes and hear a high-pitched squealing sound, it indicates that your brake pads are worn out. Such sound can also result from the accumulation of dust on your brake pads. Rust and debris on the rotors are also common causes. It is essential to take your brakes for a check-up whenever you hear such sounds.

Low Break Pressure

The brake pedals should be firm whenever you press them. Such a feeling should increase the more you press the pedals. If you press the brake pedal, but they freely move without resistance, it could indicate leakage on the brake lines. In worse cases, it implies that the entire braking system is failing. 

When driving and your brakes become soft, consider pulling over and calling your mechanic for assistance.

Brake Pedal Vibration

Pedal vibrations are common, especially when your rotors are worn out due to friction or heat. Whenever the brake pedals of your truck become bumpy or vibrate, get your truck checked immediately. This is one of the most crucial things that call for diagnosing brakes of the truck.

Checking the Brake Fluids

When diagnosing brakes, something that every truck owner should always remember is to check on the levels of the brake fluid. It is thus necessary to know the location of the brake fluid reservoir. The brake fluid reservoir has marks that will help you determine the right brake fluid level. 

If the brake fluid is below the marked level, consider replacing it. Apart from the right fluid level, consider using the right brake fluid for your truck. You can do this by checking your truck manual. It is in this book that the manufacturer recommends the right brake fluid for your truck. 

Inspect the Brake Lines & the Master Cylinder

Brake lines and the master cylinder are important parts of the braking system. They play the role of transferring the brake fluid from the reservoir to the brakes. The lines should never have any leakage.

When checking for leakages on the brake lines, pay more attention to the joints between the lines and the cylinder. Also, always remember to check the lines right from the reservoir tank. 

Inspect the Brake Pads

The brake pads take all the heat when braking. They thus have higher chances of wearing out very fast. Consider checking your pads after 6,000 miles. To do this, you have to remove your wheels. 

Conclusion,

As a driver, brakes will help you to have complete control to your truck. They should therefore be in perfect working condition. You can achieve this by performing regular check-ups and diagnosis to determine if all the parts are working perfectly. When diagnosing brakes, check all the parts of the braking system. 

Tips To Choose the Right Truck Repair Shop

Do you have a favorite truck repair shop? If so, how did you get to choose that particular repair shop and not any other? Trucks are slowly gaining popularity, and most people now prefer buying trucks to SUVs. Since trucks are becoming common on our roads, you might think it is easy to find a truck repair shop. Finding a truck repair shop is one of the tasks that will make you sweat. 

You will find various truck repair shops on the streets, but you will need help to find one that serves all your needs with honesty and urgency. So what makes up a repair shop? Several factors like customer service, experience, rates, and feedback. Here are the tips when choosing a truck repair shop for a new truck owner or if you need to change your repair shop.

Seek Recommendations

The old way of knowing the best repair shop is through recommendations from truck owners. Just the way you seek recommendations on the best lawyer or doctor from friends, the same approach is vital when selecting the best repair shop. 

The safest approach is to consult friends and truck owners when searching for a repair shop. They have prior knowledge of how repair shop works and will give advice that will enable you to choose the right repair shop for your truck.

Consider asking those you trust and are always willing to give you truthful information. Neighbors, friends, family members, and workmates are some of the people who can offer you genuine information. 

Visit Various Truck Repair Shops Websites and Focus On the Reviews Section

In this era of technology, you do not need to move downtown to look for the best truck repair shop physically. As long you have a computer or a smartphone and can access the internet, use Google to find truck repair shops around you.

After a list of all shops appears, never be attracted by their fancy name or the services they offer, but rush to the reviews sections to check the feedbacks that their client has left. Consider choosing that repair shop with the best reviews. Such shops will offer you exemplary services.

Compare the Price Range

Various truck repair shops have almost the similar equipment you need to repair your truck. However, what brings the difference is the charges for the services that they offer. Before taking your truck to any repair shop, consider comparing and contrasting their charges for various services. 

The prices usually vary depending on how popular the shop is and the level of services they offer. If you come across a truck repair shop that charges higher rates, consider finding out why they are doing so. 

Ask If they Have Legal Documents

For safety, before taking your truck to any repair shop, consider knowing if that shop is licensed and certified to offer the kind of repair you need. Doing this ensures that your truck is in safe and capable hands. 

Conclusion,

There are several truck repair shops on the streets, and such shops are on the fight over clients. Not all offer the service you require, and not all have what it takes to run such shops. Before taking your truck to any repair shop, consider the above tips. It will save you from landing in the most unreliable repair shop. 

When Should You Replace Truck Parts?

Even if you put more effort into ensuring that your truck is in good shape, most of its parts will wear out and need replacement. When should you replace truck parts? If you drive your truck daily, it will require regular maintenance for an extended lifespan. Regular truck maintenance will save you from hefty and costly repairs. However, many truck owners need to be more conversant with when to replace various truck parts of their trucks. 

It is hard to determine when to replace various truck parts because they wear down at different times and need a replacement in a specific month or year. Here is a short guide that will help you know when to replace your truck’s vital parts.

Battery

Your truck’s battery ages and becomes less powerful as it serves you. When its strength starts to weaken, your truck’s performance will go down. A truck battery, just like other batteries, usually charges and discharge. Such activity weakens it, and it will require a replacement. 

A good battery will give you at least 4-5 years of service, so prepare to replace your battery after every 5 years. Apart from replacement, consult a professional to check your battery after every year. The checkup aims to identify the physical damages, dirty terminals, and broken cables. 

Tires

Tires are among the most important truck parts that need replacement more often. The role they play exposes them to regular tear and wear. Your truck’s safety and performance depend on the condition of its tires. Therefore, performing a routine inspection of your tires is essential.

High-quality tires will serve you for several years, but you should consider replacing them when necessary. Several factors can interfere with the lifespan of your tires, like your driving habit and terrain. Therefore, replacing your tires after 5-7 years is essential.

Brake Rotors

The braking system has various components. The common one is the brake pads because they are prone to tear and wear. However, another integral part of the braking system is the rotors. It is the rotors that stop your truck because they are friction-based components. 

When you press the brake pedals, the friction from the rotors exposes them to wear, which might make them less effective. The rotors thus require a replacement as needed. Generally, the rotors will give you a service of 50,000 to 70,000 miles. Consider replacing your rotors after covering this mile. 

Shock & Struts

Shocks and struts are vital components of the suspension system. As the name suggests, the shock absorbers enable the wheels to recover whenever your truck hits a bump. On the other hand, the struts support your truck’s weight and determine how your truck handles while driving.

Most shocks and struts offer a lifetime guarantee, but you should consider replacing them after every 50,000 to 100,000 miles.

Conclusion,

Apart from the above-discussed parts, other important parts of your truck will need a replacement. The exterior lights, spark plugs, windshield, door handles, and locks are some parts you will have to replace with time. Consider taking your truck to a professional for a thorough inspection after a few months. Apart from inspection, be attentive to the warning signs your truck will be showing.